You should have your off-grid wind turbine installation by a professional installer.
If you don’t have professional installer, we suggest to follow our guidance.
With our guidance, you can do your home off-grid wind turbine installation step by step.
Here is take a 5kw off-grid wind turbine installation for example.
Wind turbine installation-Connection drawing
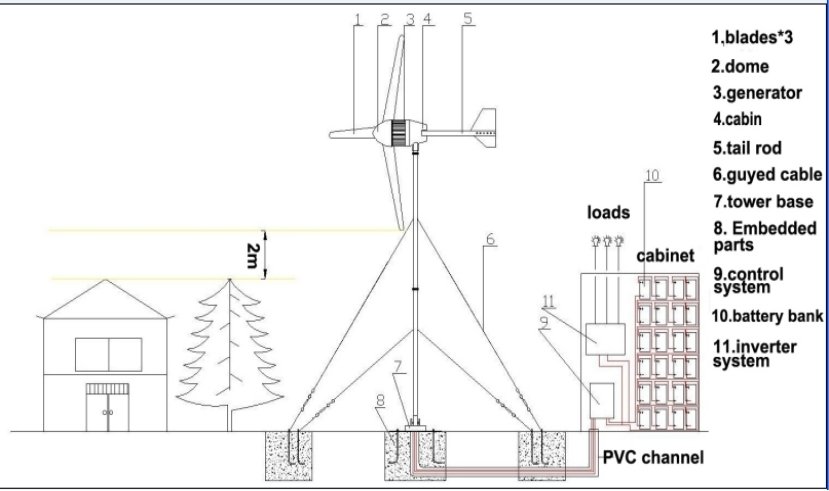
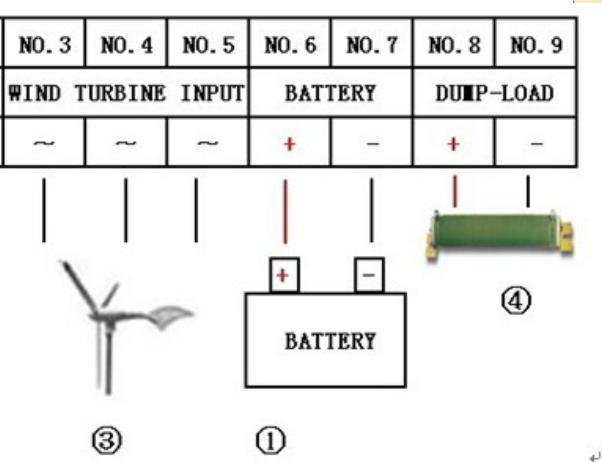
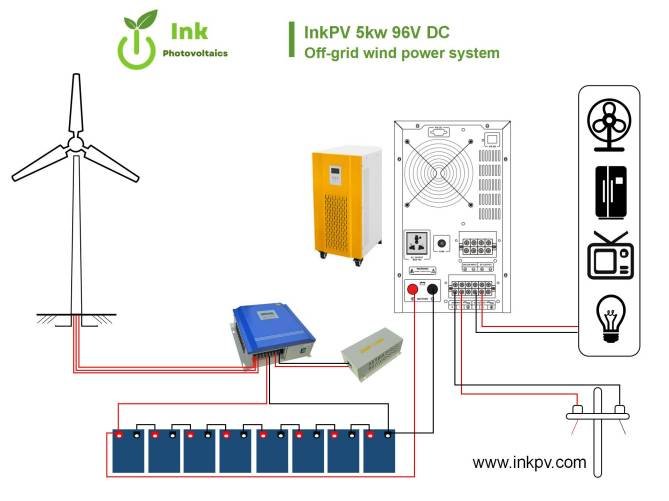
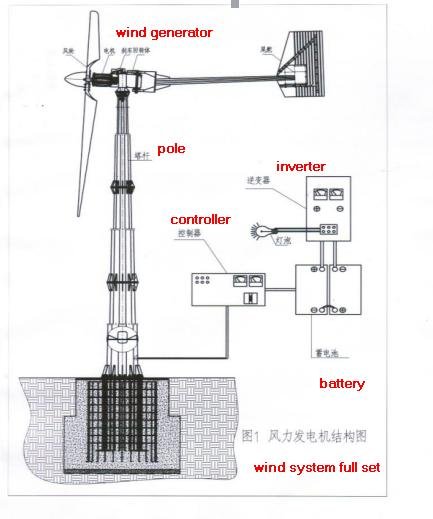
First of all, let us take a look of the connection drawing for wind turbine installation. Every part in the connection drawing is very important.
There are a 5kw wind turbine, controller with dump load, inverter,8pcs batteries on the system.
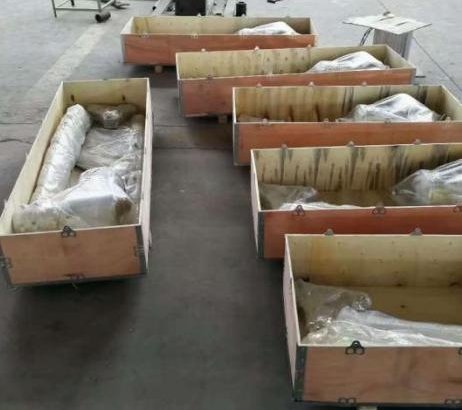
1.Open the boxes and check the packing list.
2.Choose a place to put on the wind turbine where there is no barrier.And distant from wind turbine to batteries should less than 30m.
3.Fully charge the battery by inverter if you have city grid power.
4.1.layout of tower base and anchor (pic 1-2). Attention: the connection line from anchor A to B should be parallel to the connection line of the two pin holes on the base, which is to ensure the tension of guyed cables balanced and adjustable.
Preparation
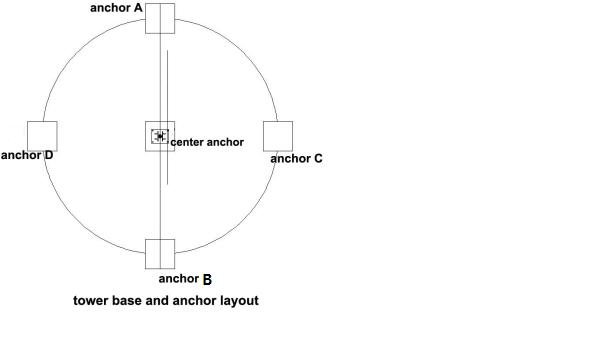
Pic1-2
4.2 Dig holes for concrete pouring following the layout, the center base hole and the dimension of the four anchor holes around suggested as below:
| Tower of hight | The anchor holes distance from the center | L&W of center hole | H of center hole | L&H of anchor hole | H of anchor hole |
| 9m | 6m | 1.1m | 1m | 0.9m | 1.5m |
| 12m | 9m | 1.1m | 1.1m | 0.9m | 1.6m |
| 18m | 15m | 1.1m | 1.2m | 0.9m | 1.8m |
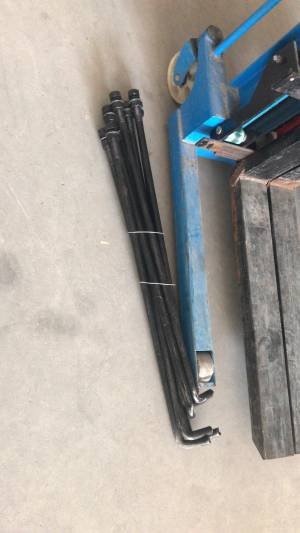
4.3 For the center hole,pour concrete, and mix with some steel bar and put 4 anchor bolts into the ground,please make sure the base hole align with the anchor bolts
4.4 For the four anchor holes around,use 4 ring shape anchor separately (one end embedded in the ground) , the ring above ground installed toward tower base, adjust the distance of 4 ring anchor from the center of tower base to make even distance
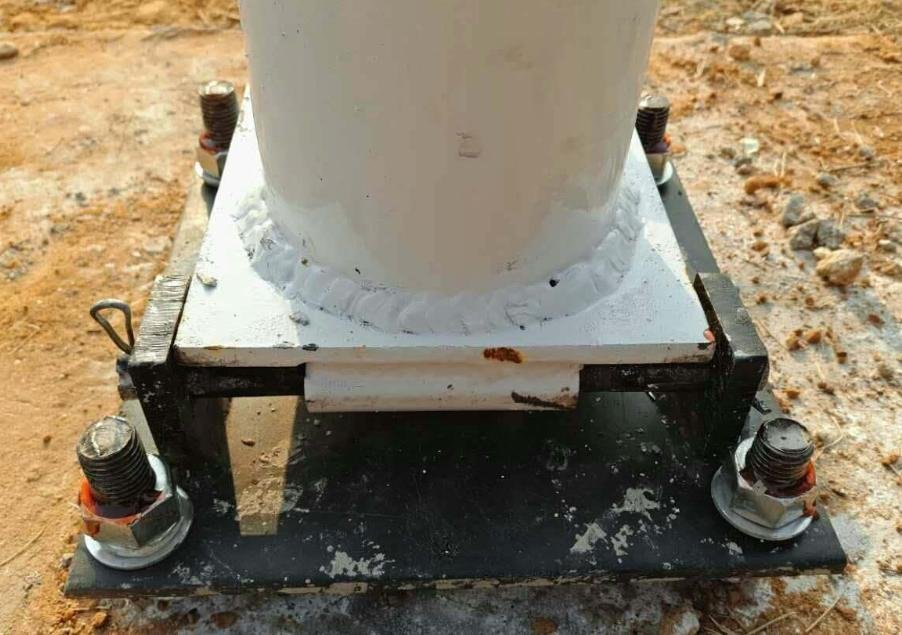
4.5 Fix the tower base on the concrete block with nuts.
4.6 The curing period of concrete is generally 100 hours, and the wind turbine should not be installed during the curing period.
Assembling requirements:
1. Before the wind turbine installation generator or in the process of maintenance, please be sure to read the users manual first.
2. Please don’t install or the dismantle wind turbines in rainy days or when the wind scale is at Level 3 or above.
3. After opening the package, it is advised to short circuit the three leads of the wind turbines (the exposed copper parts should be screwed together).
4. Before the installation of the wind turbine, lightning grounding must be prepared. You can arrange the facilities according to national standards, or you may arrange them according to the local environment and soil condition. Table 1 is for reference.
5.When assembling the Wind turbine, All the parts should be fastened with fasteners specified in table2.
| Serial | Fasteners | Spec | Qty | Tightening Torque (N*M) | Remark | Executive Standard |
| 1 | Screw for blades | M16 | 24 | >98 | | |
| 2 | Screw on shaft | M42 | 1 | >980 | | |
| 3 | Tail board screw | M20 | 1 | >980 | | |
| 4 | Tail board screw | M16 | 10 | ≥14 | | |
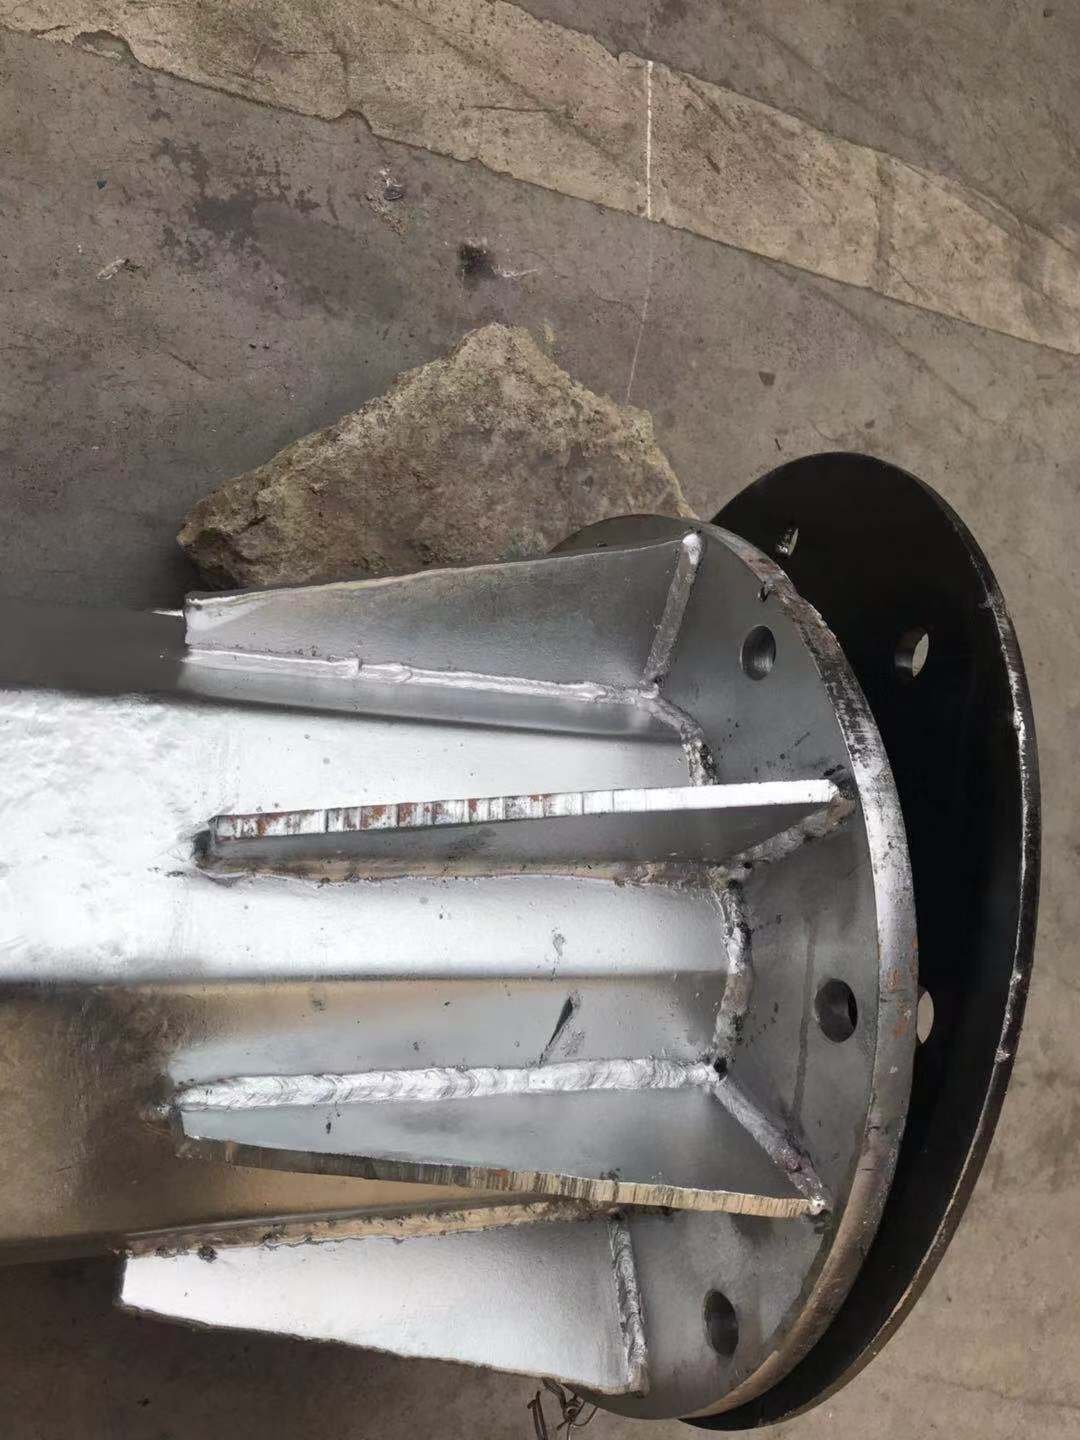
| 5 | Swivel flange nuts and tower connection Screw | M16 | 8 | ≥98 | | |
| 6 | Guyed cables clamp Screw | M12 | 16 | ≥24 | | |
| 7 | Guyed cables clamp Screw | M10 | 16 | ≥12 | | |
6.Before hoisting the wind turbine installation, the end (which is to be connected with controller)of the tower leads is suggested to cut away the insulating layer for 20mm or so. Then screw the three exposed leads (shot circuit) together.
7.Before the connection between the wind turbine flange and the tower flange, please connect the three leads of the wind turbine to the three leads from the tower accordingly. When using the hinge method, every pair of wires should be no less than 60mm in length and be wrapped with Acetate cloth tape for three layers, then sheathed with spun glass paint tube.
With this method, connect the three pairs of wires (attention: the joint of the wires can't bear the weight of the tower leads pull directly, so wires 100mm downward from the joint should be wrapped with adhesive tape and fastened with the ring on the wind turbine flange, then stuffed into the tower steel pipe. After that, wind turbine flange and tower flange can be connected.
8. During the installation, it is prohibited to revolve the rotor blades roughly (the ends of wind turbine leads or the tower leads are short-circuited at this moment). Only after all the installation and the examination is finished and the security of the erection crew is guaranteed, it is allowed to dismantle short circuited leads and then connect with controller and battery before running.
If above stated instruction are not followed when assembling and installing the wind turbines, we are sorry that any problem or failure resulted are not to be covered by warranty.
Attention
Battery should be connected with controller before wind turbine connected with controller
Wind turbine Assembling
1.Open the package,check if goods same as listed in the packing list
2.First put the bottom section of tower into the tower base,then thrust the pin shaft into the pin holes on the tower base
3. Connect the middle and upper section of tower orderly ,then place it onto a wood stand

4. Pull the 3 cables of wind generator through the tower pipe,and led out from the hole on the bottom section of tower.

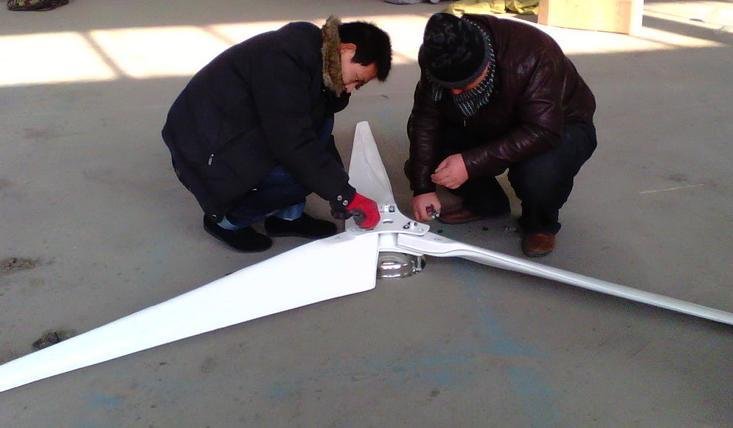
5, Blades installation, put the windward side upward(pic 2-1),screw the bolt(not to screw it tight),adjust the blades ends distance to be balanced, then screw tight bolts, make sure L1=L2=L3, allowance within 5mm(please refer to pic 2-2

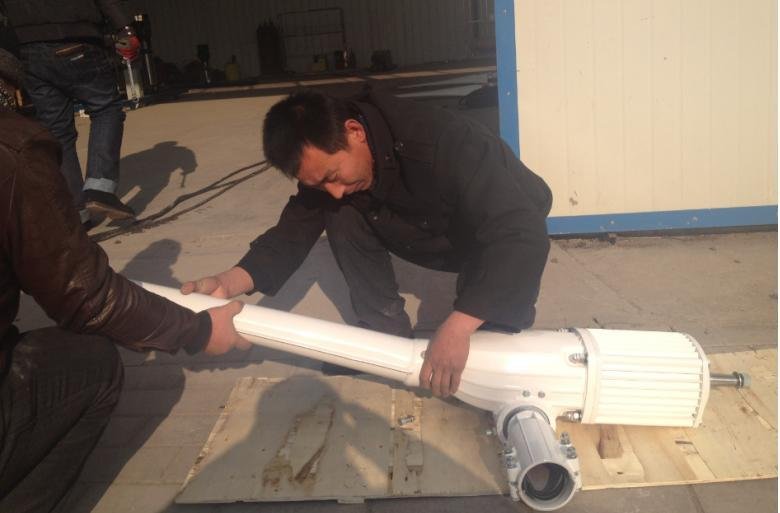
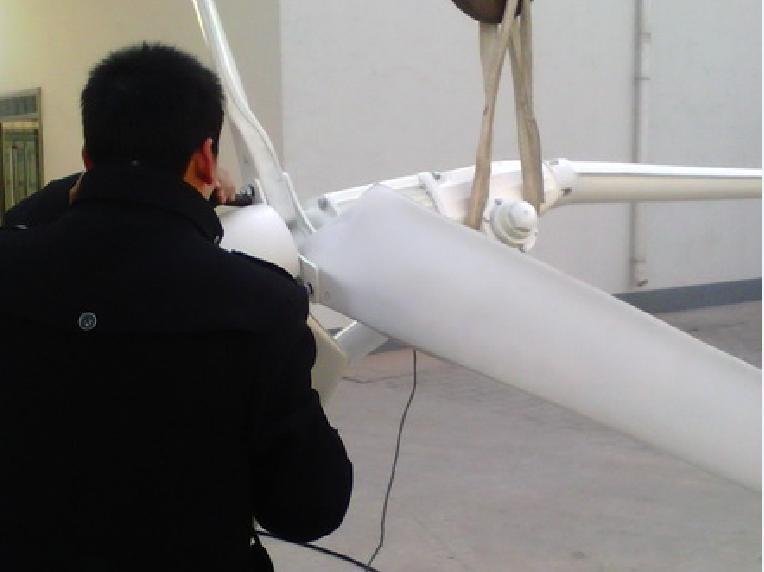
4.Fasten the tower flange and the wind turbine flange with bolts, please make sure the wind generator shaft is upward to make easy blades installation.
5.Install the blades with hub onto the generator shaft,then covered with dome.
8.Tail installation, the side with buffering ( refer to pic 2-3), the tail board fix on the left of
tail(pic2-4) with the small end upward( pic2-5)
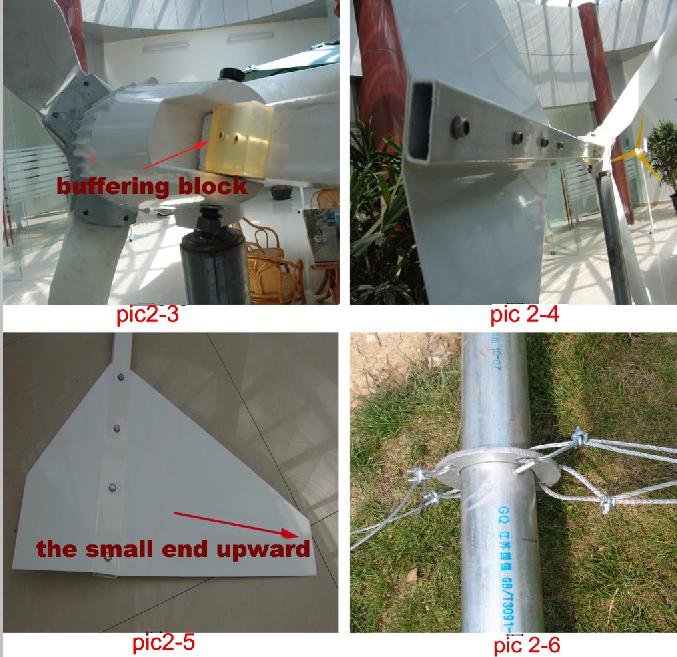
9.Pull the steel guyed cables through the holes on the upper tower( pic 2-6), the left and right guyed cables connected to the side anchors with Turnbuckle, the back guyed cable fixed with the back anchor with the same length as left and right cables, please make sure the three cables does not wrap together, the front cable fixed with front anchor after the tower hoisted vertically.
10.Check the tension of guyed cables, adjust its tension by rotating the Turnbuckles to make sure tower not bent when too tight or shake when too loose.
Tower
There are 2 types of tower for the wind turbine installation. One is guy cable tower, the other is stand alone tower.
Stand alone tower
Wind controller with dump load
1.The controller should be placed in dry, well ventilated place, moisture and dust-proofed, inverter shell should be kept grounded and more than 1.5 meters away from the batteries to avoid acid gas pollution during wind turbine installation.
2.The positive terminal of battery indicator on the controller should be connected with the positive electrode of last battery and negative terminal with negative electrode on the first battery
3. Connect the three wires of wind turbine correspondingly with the wind turbine terminals on the controller.
4. Please be noted that the input voltage of inverter should equate with the batteries voltage in series.
5. It is prohibited to run the wind turbine without load to avoid blades damage when high speed rotation
Battery bank
1. The battery should be placed in a dry,ventilated place, a cabinet is suggested to hold batteries,controller and inverters during wind turbine installation.
2. Connect batteries in series or parallel as needs, connect the positive electrode of the first battery to the negative electrode of the second batteries, same is to be followed with other batteries.
3. Lubricate all the terminals with grease or other anti-corrosion materials, install fuse on the positive terminals of battery bank and keep the cables between controller and batteries within 3m to avoid possible electronic magnet interference.

Our will be wiring the battery bank with 8pcs batteries, to create a 96V±10V battery bank.
When wiring the battery cable, ensure that you fully attach each cable at both ends before moving onto the next.
Connect the batteries via breaker to the inverter in wind turbine installation. The inverter usually installed near the main panel and better to put in in cool place. It should be indoor and well kept.
Usually there are 2 mode for inverter option. You can choose according to your need.
City first: In daytime, solar panel charge the battery. When city grid cut off, the inverter switch to use battery power.
Battery first: In daytime, solar panel charge the battery. Battery supply power. When battery power not enough, inverter switch to use grid power. When battery is fully charged, the inverter will switch to use battery power again.
Click here to know more about how to read the inverter data sheet.
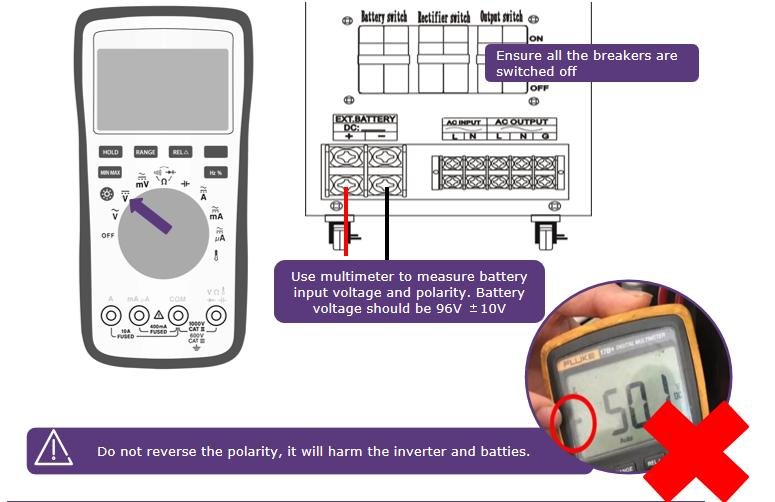
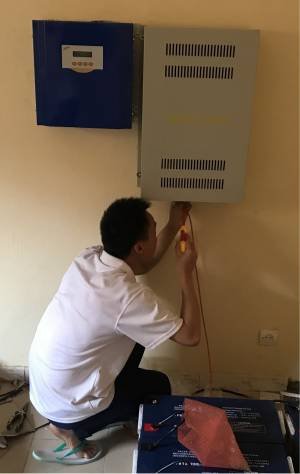
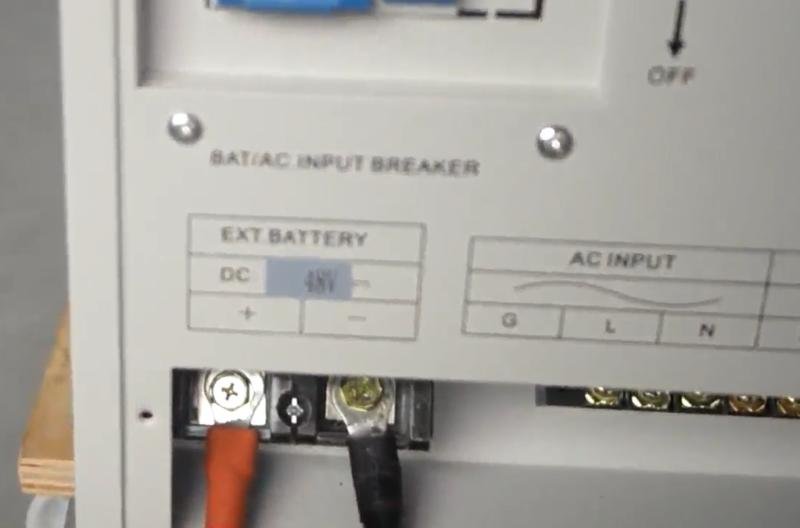
Use Multimeter to test the voltage, and do not reverse the polarity, it will harm the battery and the inverter. Battery voltage should be 96V ±10V
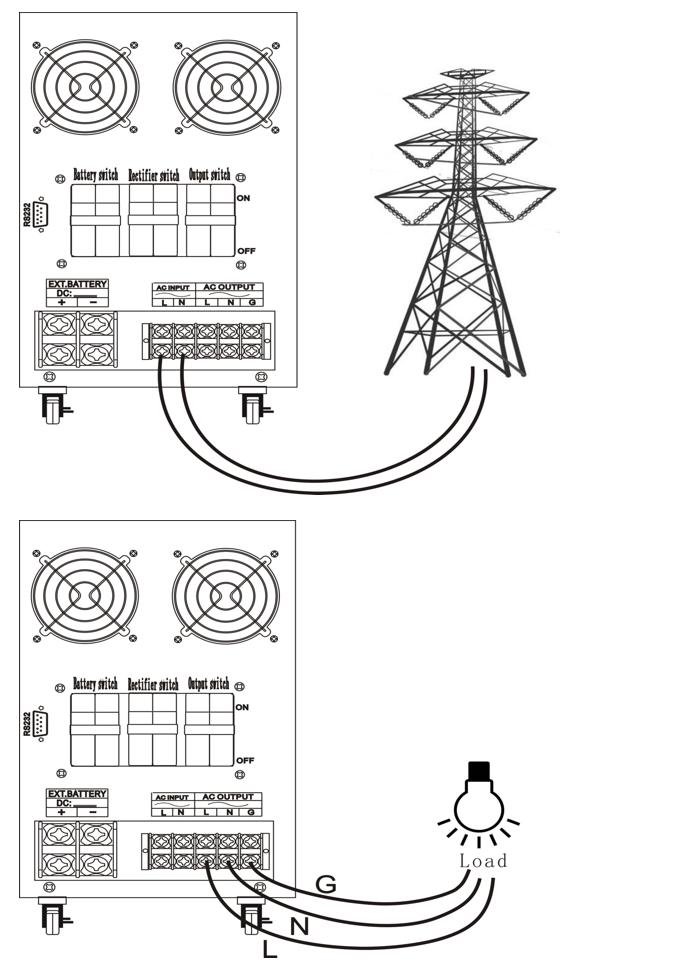
Connect AC input from grid and AC output for your home appliance for the wind turbine installation.
Last word
If you have any question about home wind turbine installation, contact us for help.